A Loan Group is a three-character code used to identify and organize any classification applied to a loan. Loan Groups can be used in worklist criteria to ensure one type of loan falls into the worklist. Loan Groups can be used to place restrictions on follow-up notes for loans of a specific type. They can also be used as criteria for reports and searches. Any number of Sub-Groups can be created for each Loan Group. For example, a Loan Group of "CAR" is created to signify car loans and its Sub-Groups are Secured, Repossessions, and so on.
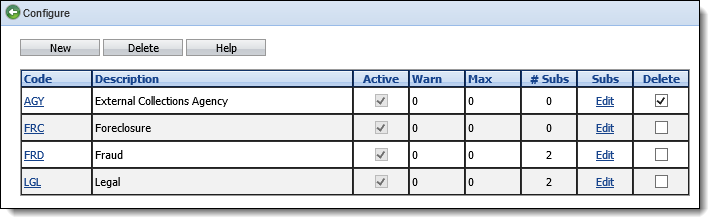
There are four pre-defined Loan Groups - Foreclosure, Fraud, Legal and Repossession. The Fraud and Legal loan groups contain sub-groups. Any of the pre-defined Loan Groups and Sub-Groups can be removed from the system.
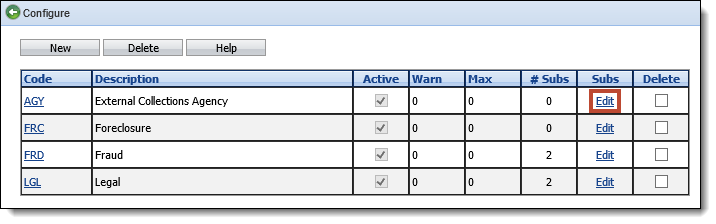
From System Management, select Collection > Loan Groups from the Classify group on the Configure tab. A list of Loan Groups and their sub-groups currently configured in the system is displayed.

On this page users can create, edit or delete a Loan Group Code and its corresponding Sub-Groups.
Creating a Loan Group
To create a new Loan Group, click the New button on the Loan Groups screen.
The New Loan Group screen appears.
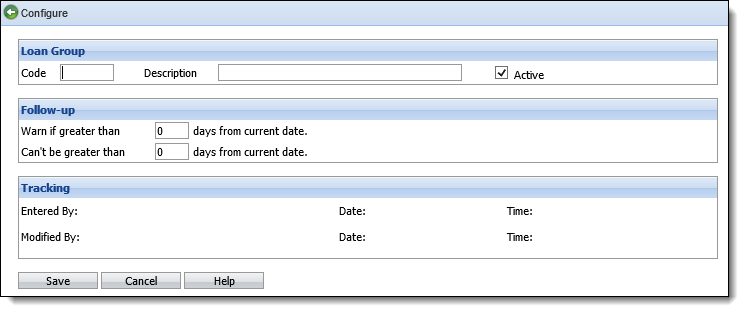
Enter the following information.
| Field | Description | ||
| Code | Enter a unique code for the new Loan Group. Any alphanumeric string with a maximum of three characters can be used. All letters are saved in upper case. Once defined on the New Loan Group screen and saved, the Code cannot be edited. | ||
| Description | Enter a description of the loan group to provide a clear description of its purpose. The description may be up to 40 characters (including spaces) in length. | ||
| Active | Ensure this checkbox is selected to activate the loan group in the system. | ||
| Warn if greater than ___ days from current date |
For loans in this loan group, if a user sets the follow up date out more than the number of days specified here, they receive a warning.
|
||
| Can't be greater than ___ days from current date |
For loans in this loan group, if a user sets the follow up date out more than the number of days specified here, they receive an error indicating they cannot set the follow up date out that far.
|
 |
Limitations can be set on follow-up dates at the Client Group, Loan Group and User levels. Where more than one limitation applies for a specific loan, the most restrictive limit is applied. |
When all information is entered, click Save. The new Loan Group appears in the list of existing Loan Groups.
Assigning an Account to a Loan Group
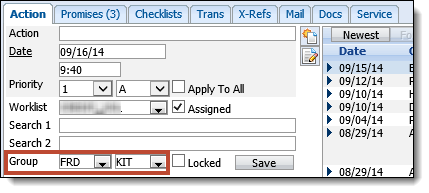
An account is assigned to a Loan Group and sub-group on the Action tab of the workspace.
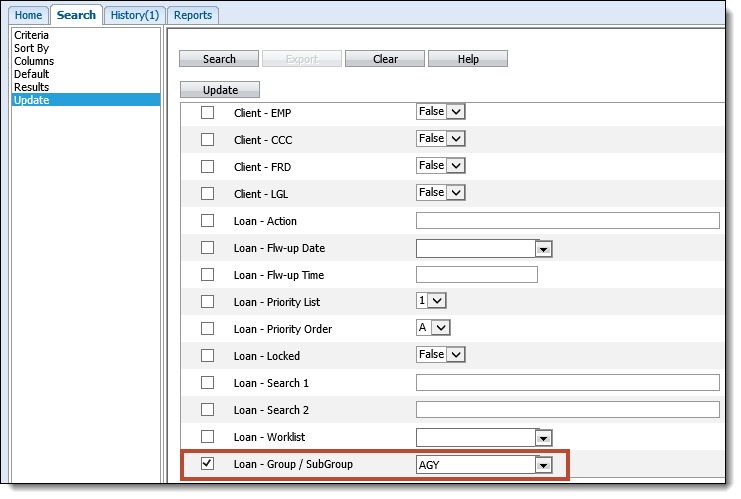
An account can also be assigned to a Loan Group via the Search Update feature. After a search is performed, navigate to the Update page. Click the Update checkbox next to Loan - Group/SubGroup and select the desired Group and sub-group from the drop-down. Then click Update. All accounts returned in the search are updated with the selected Loan Group and sub-group.
Editing a Loan Group
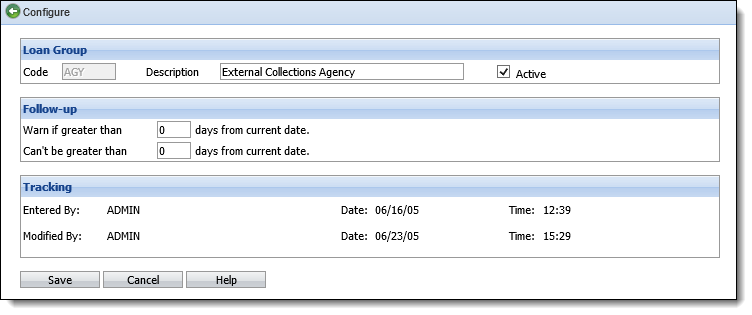
To edit a Loan Group, click the Code hyperlink of the Loan Group to edit.

Edit any fields and click Save. Click Cancel to disregard any changes.
|
The Code field cannot be edited. |
Adding a Sub-Group to a Loan Group
To add a sub-group to a Loan Group, click the Edit link in the Subs column.
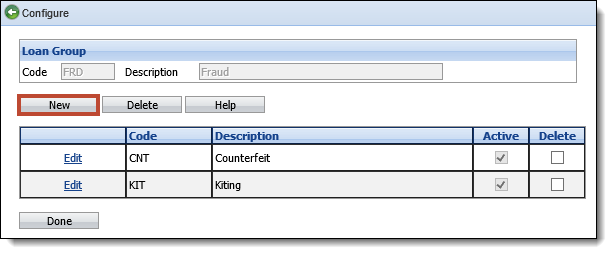
A screen appears listing the sub-groups currently configured for the Loan Group. Click New to add a new sub-group.
Enter a three character code and a description for the new sub-group. Ensure that the Active checkbox is selected and click Save.
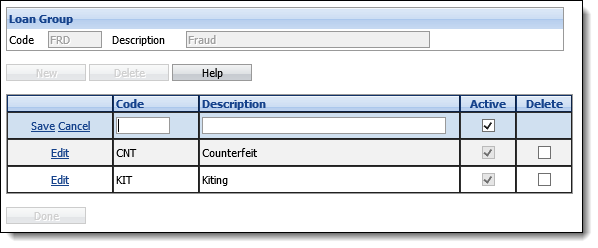
|
Once the code is entered and saved, it cannot be edited. |
The new sub-group is added to the list of sub-groups. Click Done to return to the Client Groups screen.
Editing a Sub-Group
To edit a sub-group, on the sub-groups screen, click the Edit link next to the desired sub-group. Only the Description and the Active checkbox can be edited; the Code cannot. Click Save to save the changes. Click Cancel to disregard the changes.

Deleting a Sub-Group
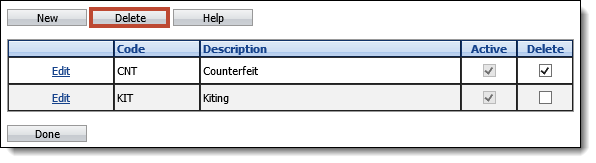
To remove a sub-group from a Loan Group, on the sub-groups screen, click the Delete checkbox next to the desired sub-group and click Delete. Click Done to return to the Loan Groups screen.
Deleting a Loan Group
Select the Delete checkbox next to the Loan Group to delete. Click the Delete button.
A prompt appears to confirm the deletion. Click OK to confirm. Click Cancel to disregard the deletion.
Once OK is selected, the Loan Group is deleted and removed from the Loan Groups screen.
|
Loan Groups and sub-groups that are linked to existing loans are not deleted - they are made inactive. Inactive Loan Groups and sub-groups cannot be applied to new or existing loans but are available for reports and searches. |